
Your eligibility threshold is the minimum monthly savings a client has to be able to save (after penalty) before they appear on your refinance list. It's the single biggest lever on what shows up.
Where To Change It
- Go to Settings.
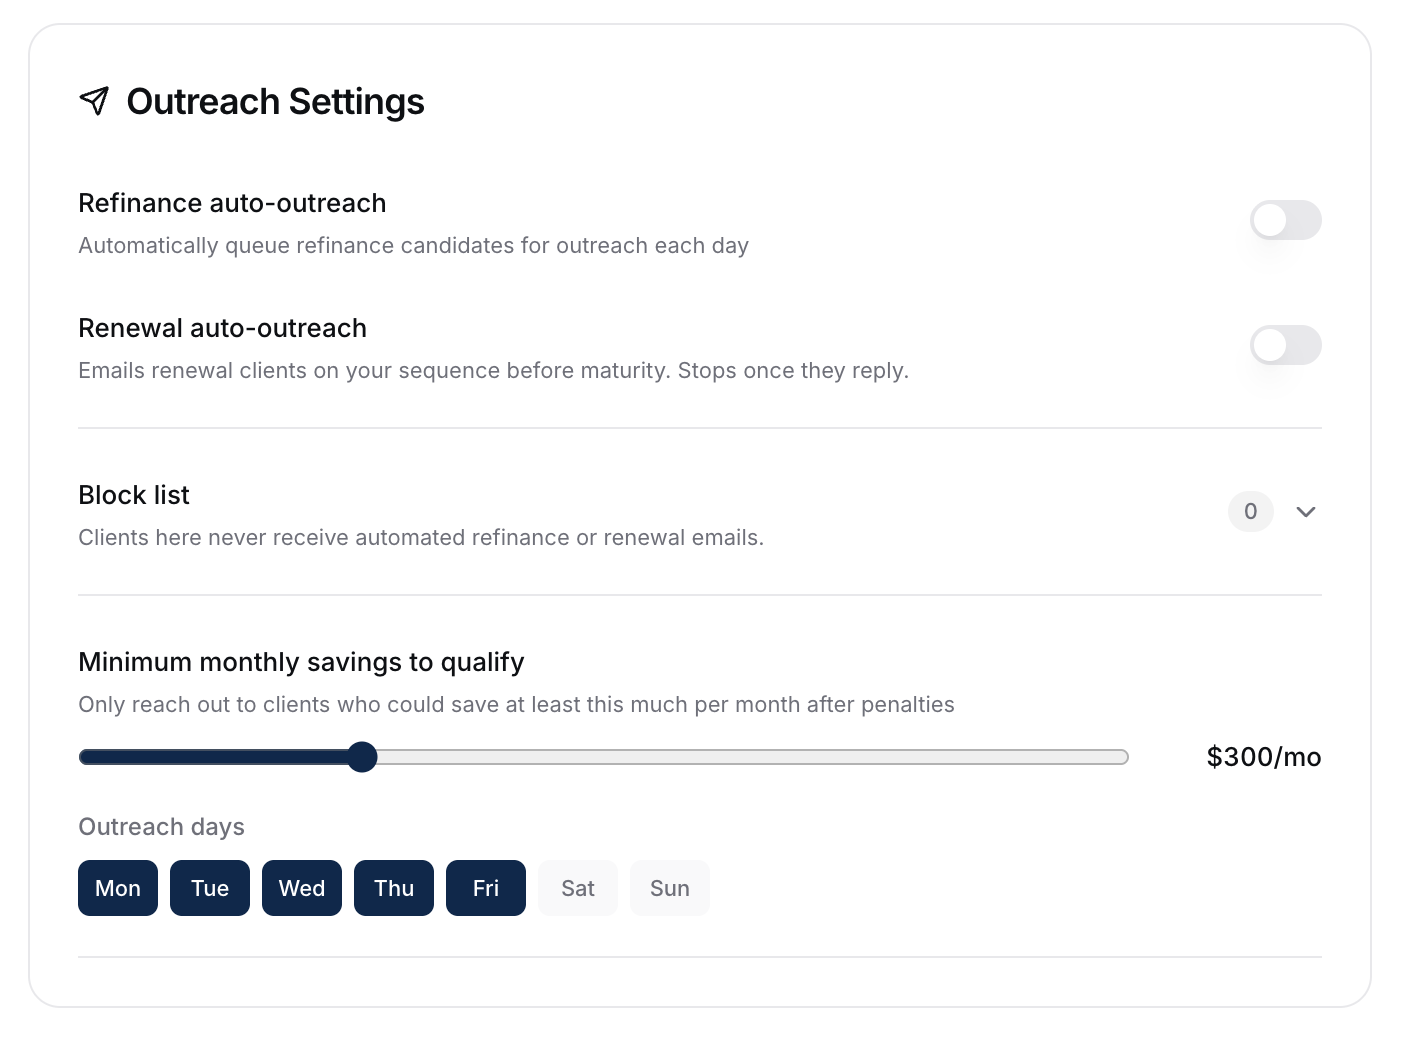
- Find the Outreach Settings card.
- Adjust the Minimum Monthly Savings slider.
Range is $50/month to $1,000/month, in $25 increments. There's no save button - your change saves on its own and a Saved confirmation appears at the bottom of the screen.
What Happens When You Change It
- Lower the threshold → more clients appear on the refinance list. You'll see weaker opportunities surface alongside stronger ones.
- Raise the threshold → fewer clients appear. Each remaining one is a stronger pitch.
The list updates immediately. Auto outreach uses the same threshold, so it'll start (or stop) targeting different clients on the next send window.
Where To Set It
There's no universally correct number. A practical starting framework:
- $100-$150/month - broad net, good for active outreach.
- $200-$300/month - focused, every client is a real conversation worth having.
- $500+/month - premium-only, you're cherry-picking your strongest opportunities.
Tune based on how much volume you can actually work. If your Contacted page is overflowing and you can't keep up, raise the threshold. If it's quiet, lower it.
A Note On Auto Outreach Capacity
Your eligibility threshold and your auto outreach capacity work together but do different things:
- Threshold controls who qualifies for the list at all.
- Capacity controls how many qualifying candidates we actually message per month.
If the math feels off (too many or too few clients getting auto outreach), check both.
Managing Your Block List
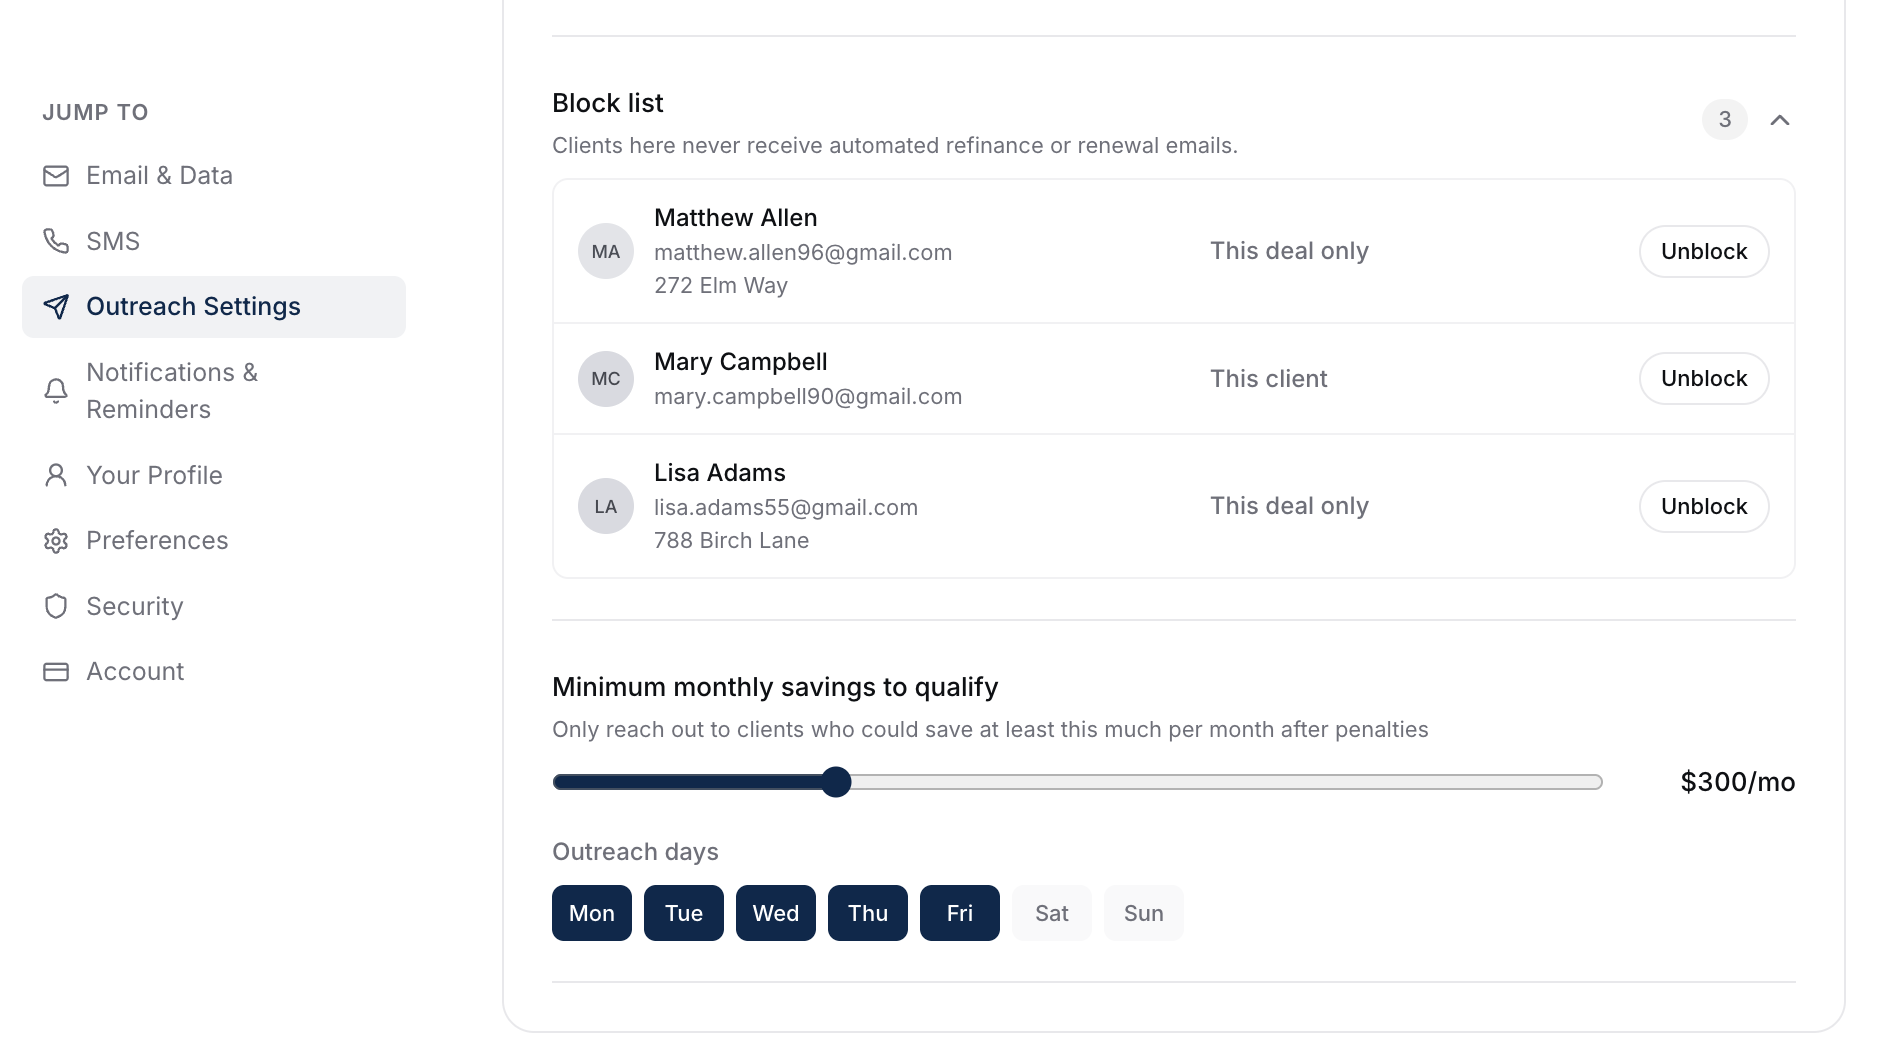
The same Outreach Settings card includes a Block List section, just above the savings slider. It's collapsed by default and shows a count of how many people are blocked. Expand it to see the list grouped by person, with each person's initials, name, and email, plus an Unblock button on each row.
You can block at two levels:
- This client - blocks the person across every current and future deal they own. Their row is labeled This client.
- This deal only - blocks a single deal. Each blocked deal gets its own row labeled This deal only, with the deal's address shown under the client's email.
To add someone, open their detail popup on the refinance or renewals list, use the email icon, and choose This deal only or This client. To remove a block, click Unblock here or in that same popup. Clicking a row in the block list opens that client's full detail card.
Blocked people, at either level, never receive automated refinance or renewal outreach emails, regardless of your threshold.
What To Do Next
- See the full list of detection criteria: How Candidates Are Detected.
- If a specific client isn't showing up: A Client Isn't Showing Up On Refinance Or Renewals.