
A custom condition is a one-off request you add to a portal for a specific client. Think of it as a free-form layer on top of the template you picked.
What Counts As A Custom Condition
- A doc you need that the template doesn't cover (e.g., "Copy of your purchase agreement signed").
- A question you need answered that the template doesn't ask (e.g., "Confirm your closing date").
- A clarification request based on something you saw in their initial submission.
Adding A Condition Before Send
While composing a portal send:
- After picking a template, click Review & send. BrokerPlus runs the portal checks and warnings first, then opens the Email and Portal review.
- Switch to the Portal tab. This is a live, editable copy of the portal for this send only.
- On the info or documents step, use the add button to create an intake field (a single typed input the borrower answers) or a document request (one or more file uploads).
- Enter a label (what the borrower sees), then click the item to fine-tune it: description, required setting, a note to your client, and visibility conditions.
- Drag items to reorder them, and remove anything this client doesn't need.
- Return to the Email tab to review the invitation. Once the email preview has loaded, click Send Portal inside the review screen. Only this button sends the email; if sending fails, the review stays open with the error.
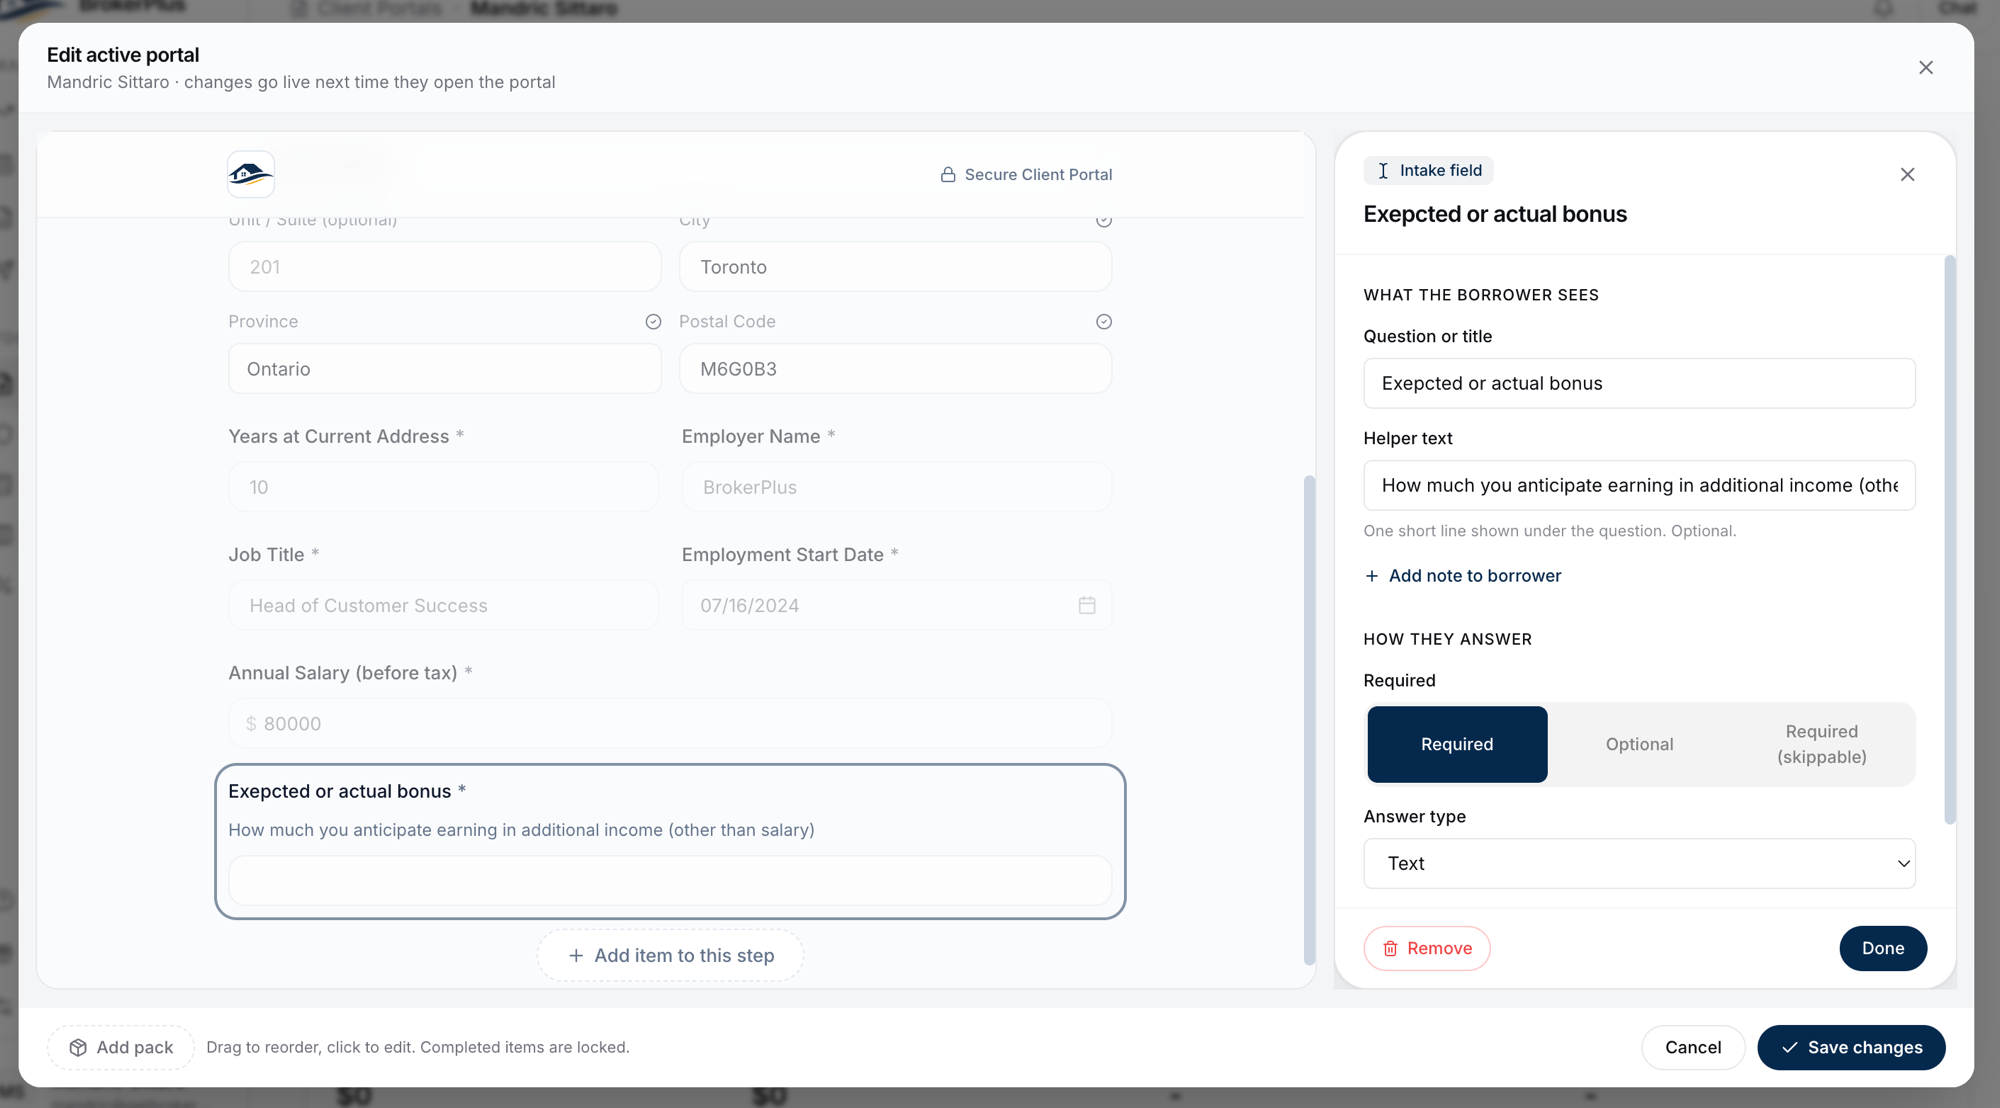
Everything you change here applies to this send only - the underlying template is never modified, and the next send of the same template starts fresh. Reset to template discards your per-send changes.
Signing forms are the one exception: you can rename, reorder, or remove them per send, but not add new ones - their PDF and signature fields live on the template.
Adding A Condition After Send
If the portal is already out and you need more info, you have two options:
- Request more info - adds a condition mid-session. The borrower gets a notification. See Working A Portal Submission.
- Request changes - flag a specific submitted doc and ask them to redo it.
Reusing Conditions Across Clients
If you find yourself adding the same custom conditions repeatedly, it might be time to bake them into a template instead. See Creating And Editing Your Own Portal Templates.
Editing Or Removing A Condition After Send
You can remove a condition you added mid-flow. The borrower's portal updates in real-time, so a removed condition disappears from their view.
What To Do Next
- Send the portal: Sending A Portal.
- For scenario-specific bundles, use addon packs instead: Addon Packs.