
Addon packs are pre-built bundles of fields and document requests for specific scenarios. Layer one or more onto your base template so you don't have to manually add the right questions every time.
How Addon Packs Work
You pick a base template, then layer one or more addon packs on top. Each pack adds the fields and document requests needed for that scenario.
Example: pick Purchase - First-Time Buyer (Salaried) as your base, then layer on Gift from a Canadian source and RRSP Home Buyers' Plan if the client is using gift funds plus their RRSP for the down payment.
You can add and remove packs from a portal at any time before or after sending.
Editing And Creating Packs
Add-on packs are yours to edit, not a fixed library. BrokerPlus seeds the defaults below at signup, and you can change any of them or build your own. Open Edit Portals on the Client Portals page, switch to the Add-on packs tab, and click a pack to open the same editor you use for templates. From there you can add or remove fields, document requests, and signing forms, set visibility rules, and use the View As single/joint toggle plus the per-item Show on and Applies to controls so a pack item only appears for the right application type or borrower. New Pack creates one from blank or by duplicating an existing pack.
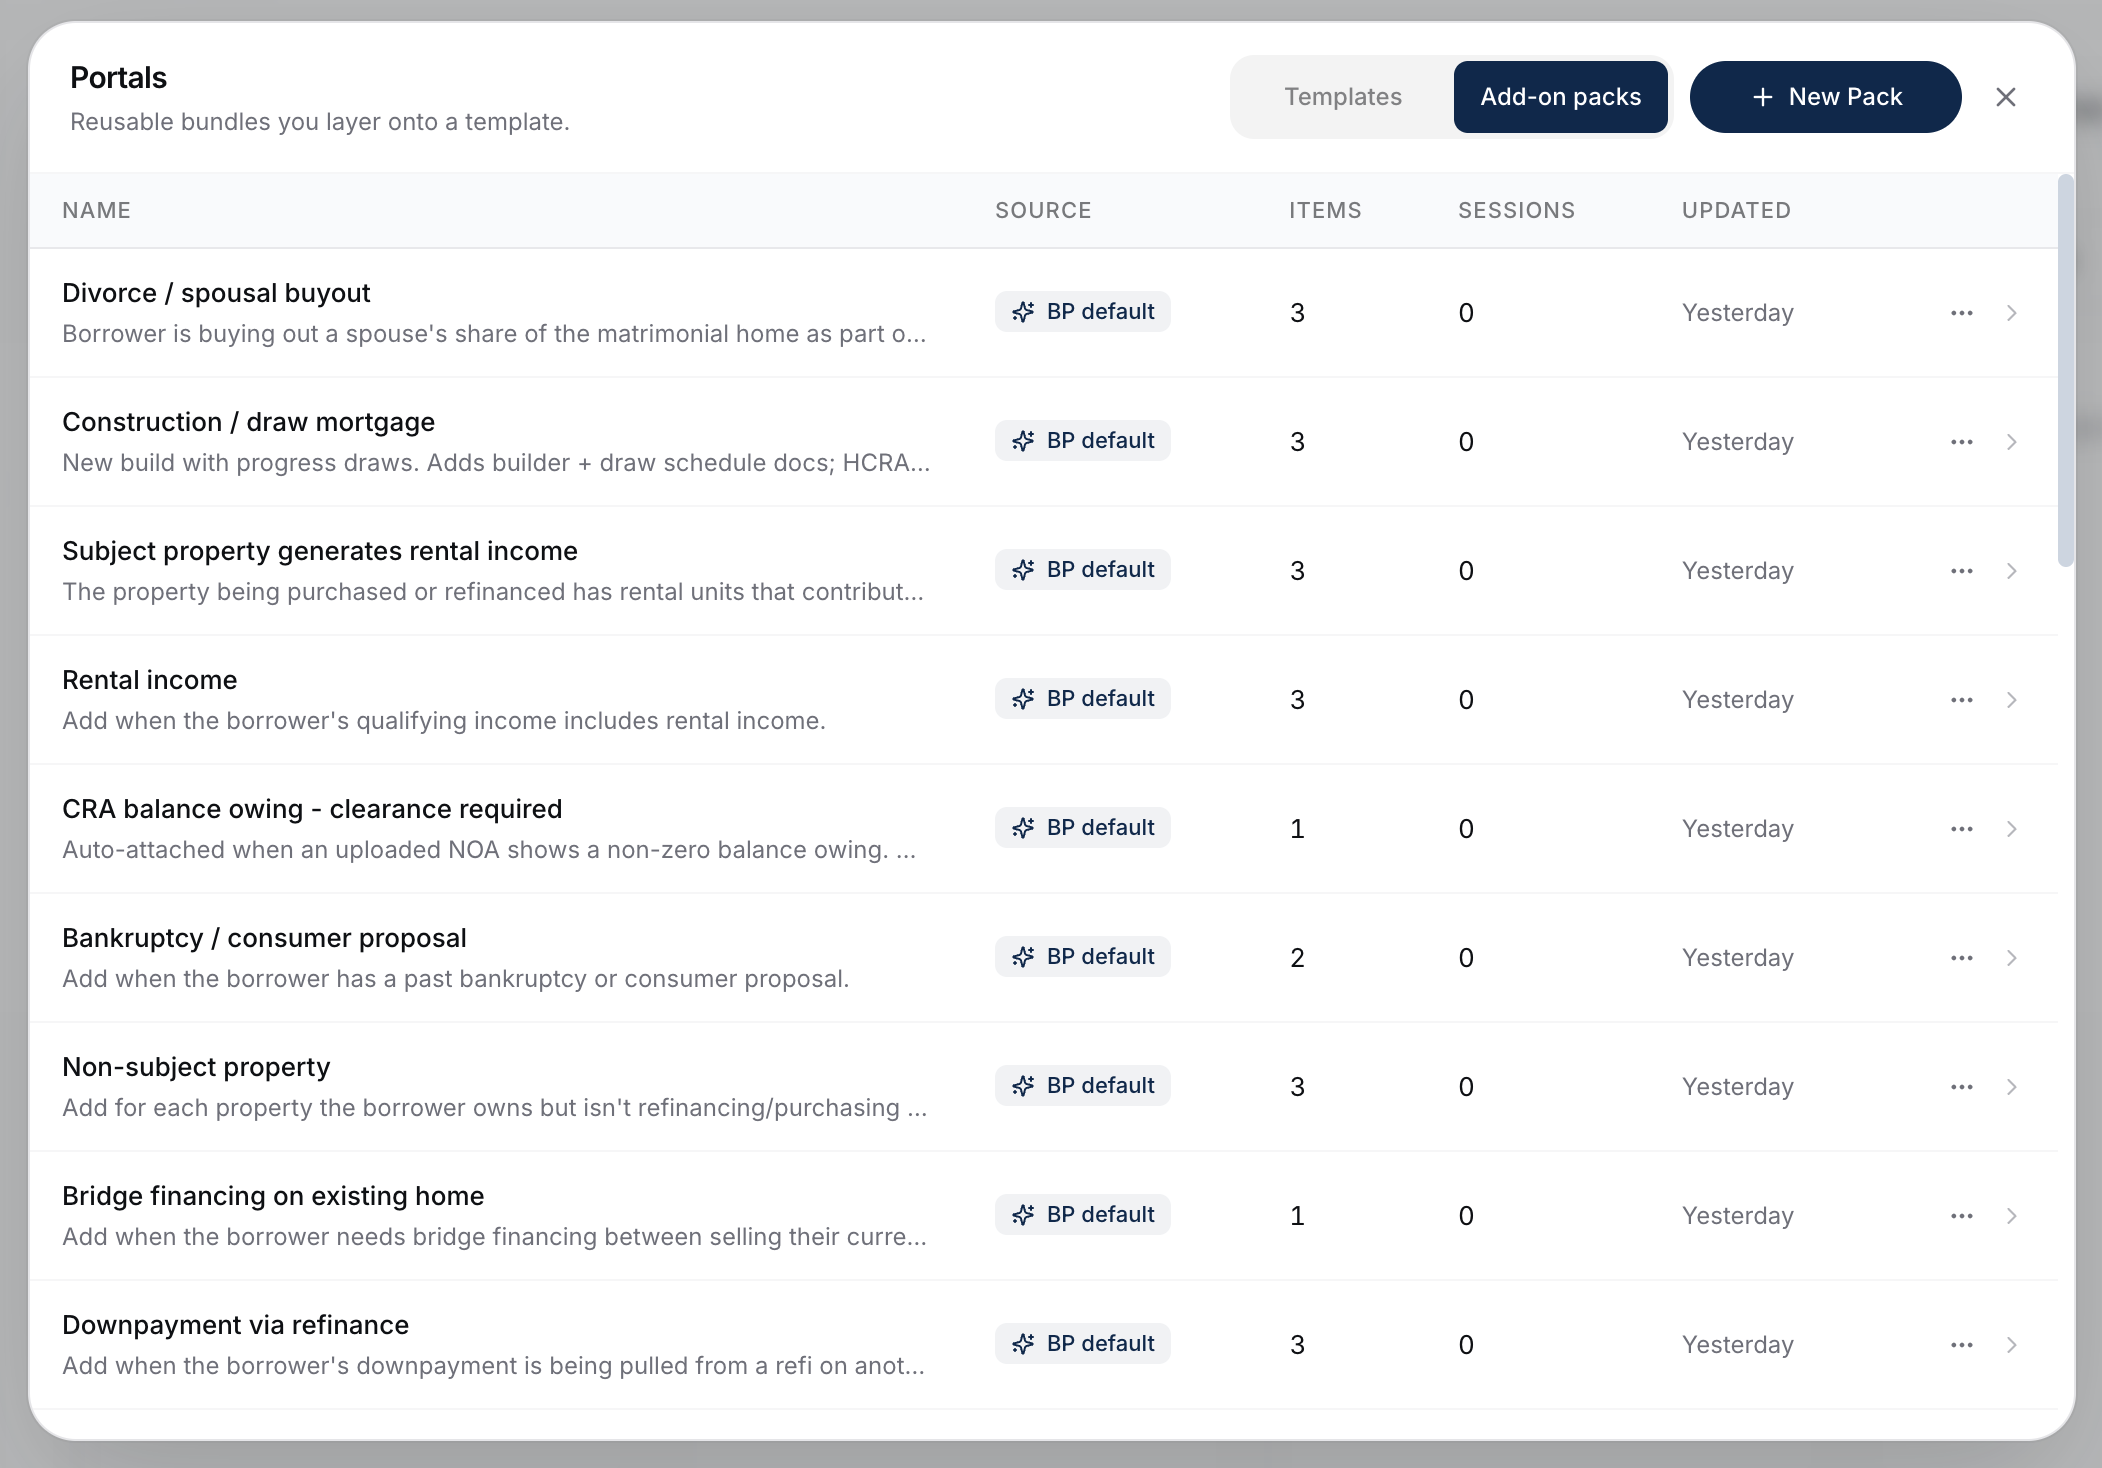
Down Payment Source Packs
For when the down payment comes from a specific source:
- Gift from a Canadian source
- Gift from outside Canada
- Downpayment via refinance
- Bridge financing on existing home
- RRSP Home Buyers' Plan
- First Home Savings Account
- TFSA Withdrawal for Down Payment
- Sale of Existing Property
- Cryptocurrency Liquidation
- Business Retained Earnings (Down Payment Source)
- Borrowed Down Payment (Flex Down)
- Closing Costs (Separate Source of Funds)
Income Packs
For specific income sources beyond what the base template captures:
- Rental income
- Subject property generates rental income
- CPP / OAS / GIS income
Life Event Packs
For situations affecting the application:
- Separation / divorce
- Divorce / spousal buyout
- Pays support (child/spousal)
- Receives support (child/spousal)
- Bankruptcy / consumer proposal
- Bankruptcy discharged
- CRA balance owing - clearance required
Status / Structure Packs
For non-standard borrower or ownership situations:
- Newcomer to Canada
- Non-resident purchaser
- Work permit holder (closed or open)
- Purchase via holdco
- Non-subject property
Property Situation Packs
For unusual property scenarios:
- Condo / strata purchase
- Construction / draw mortgage
- Vendor take-back (VTB) involved
Adding And Removing Packs
When sending a portal:
- After picking your base template, find the Addon Packs section.
- Click + Add Pack.
- Pick one or more packs from the list. Expand a pack to see what it includes - each item shows a small icon for its kind (info field, document, or signing document), and if a pack has more than 3 items, the +N more link expands inline to reveal the rest.
- Save.
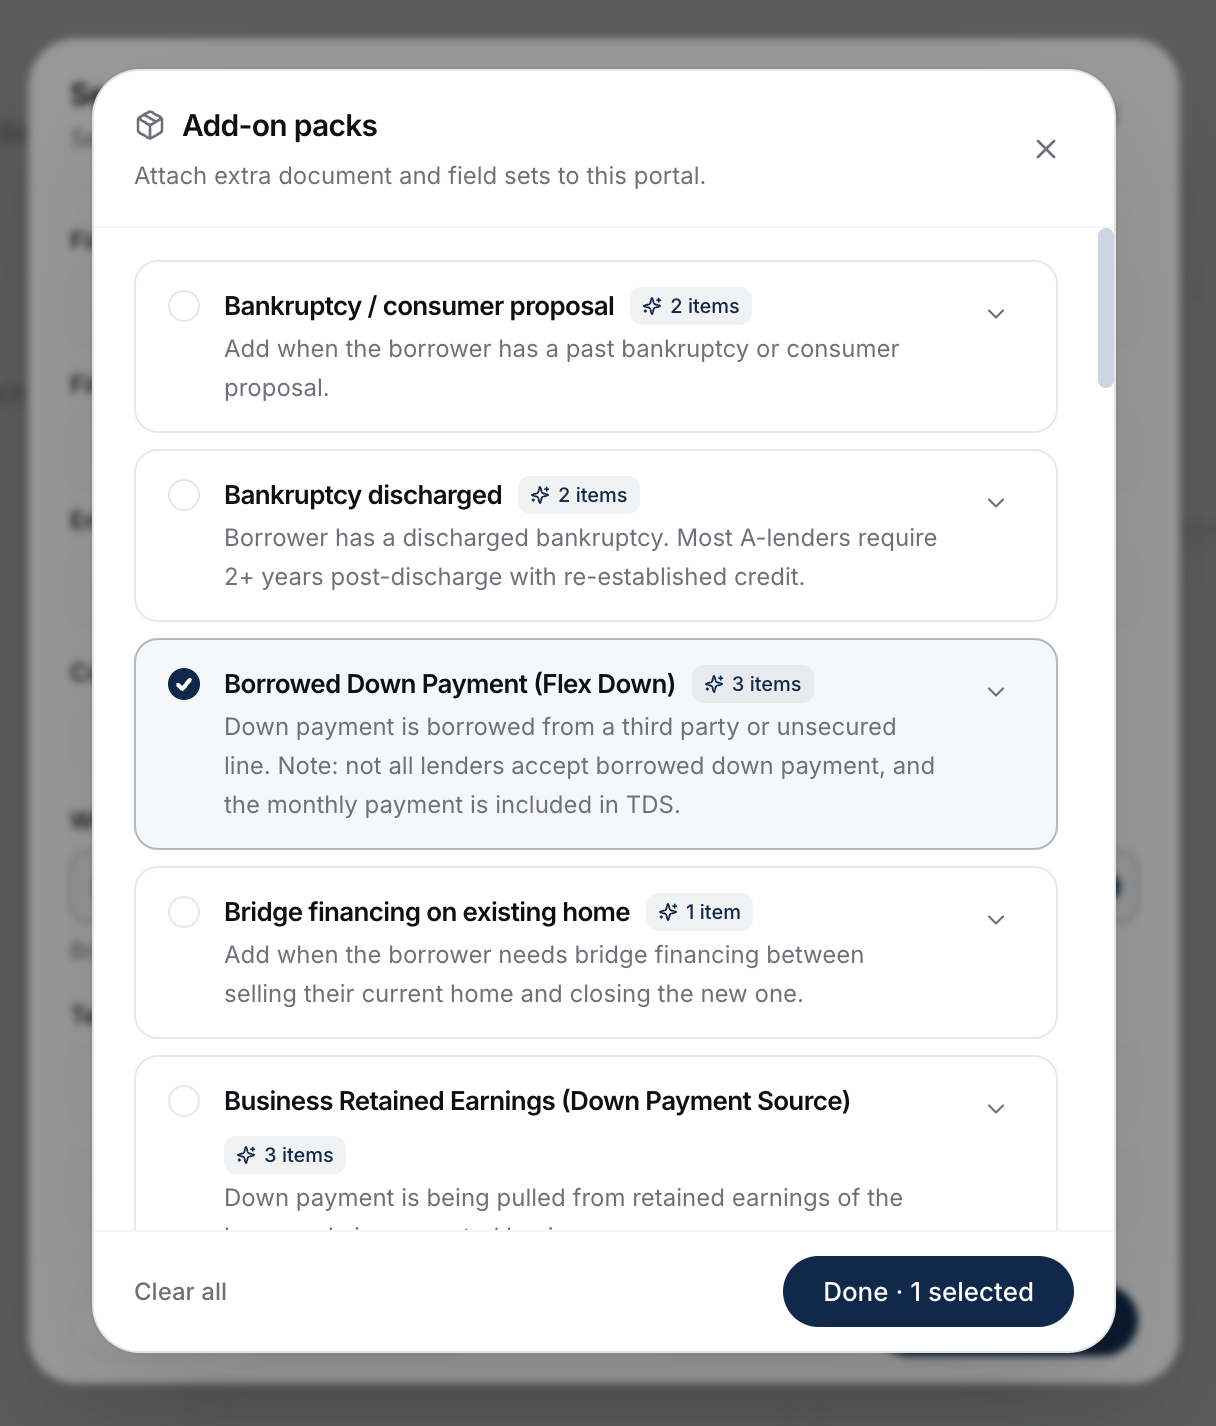
When you preview the portal from the send modal, attached packs now show up too - their document requests and info fields appear alongside the base template items, so you see exactly what the client will get.
To add a pack to a portal that's already in flight, open the session and click Edit Active Portal, then Add an add-on pack. The same screen lets you remove packs and items the client hasn't started yet. See Editing An Active Portal.
When To Use A Pack Vs A Custom Condition
- Use a pack when the scenario is one of the pre-built ones above. Faster, more consistent.
- Use a custom condition when you need a one-off request that isn't a structured scenario.
What To Do Next
- Send the portal with packs attached: Sending A Portal.
- Or add a one-off ask: Custom Conditions.