
A "candidate report" is the IRD outreach email you send to a specific client. It's the manual equivalent of what auto outreach does - same templates, just one at a time.
Opening The Send Flow
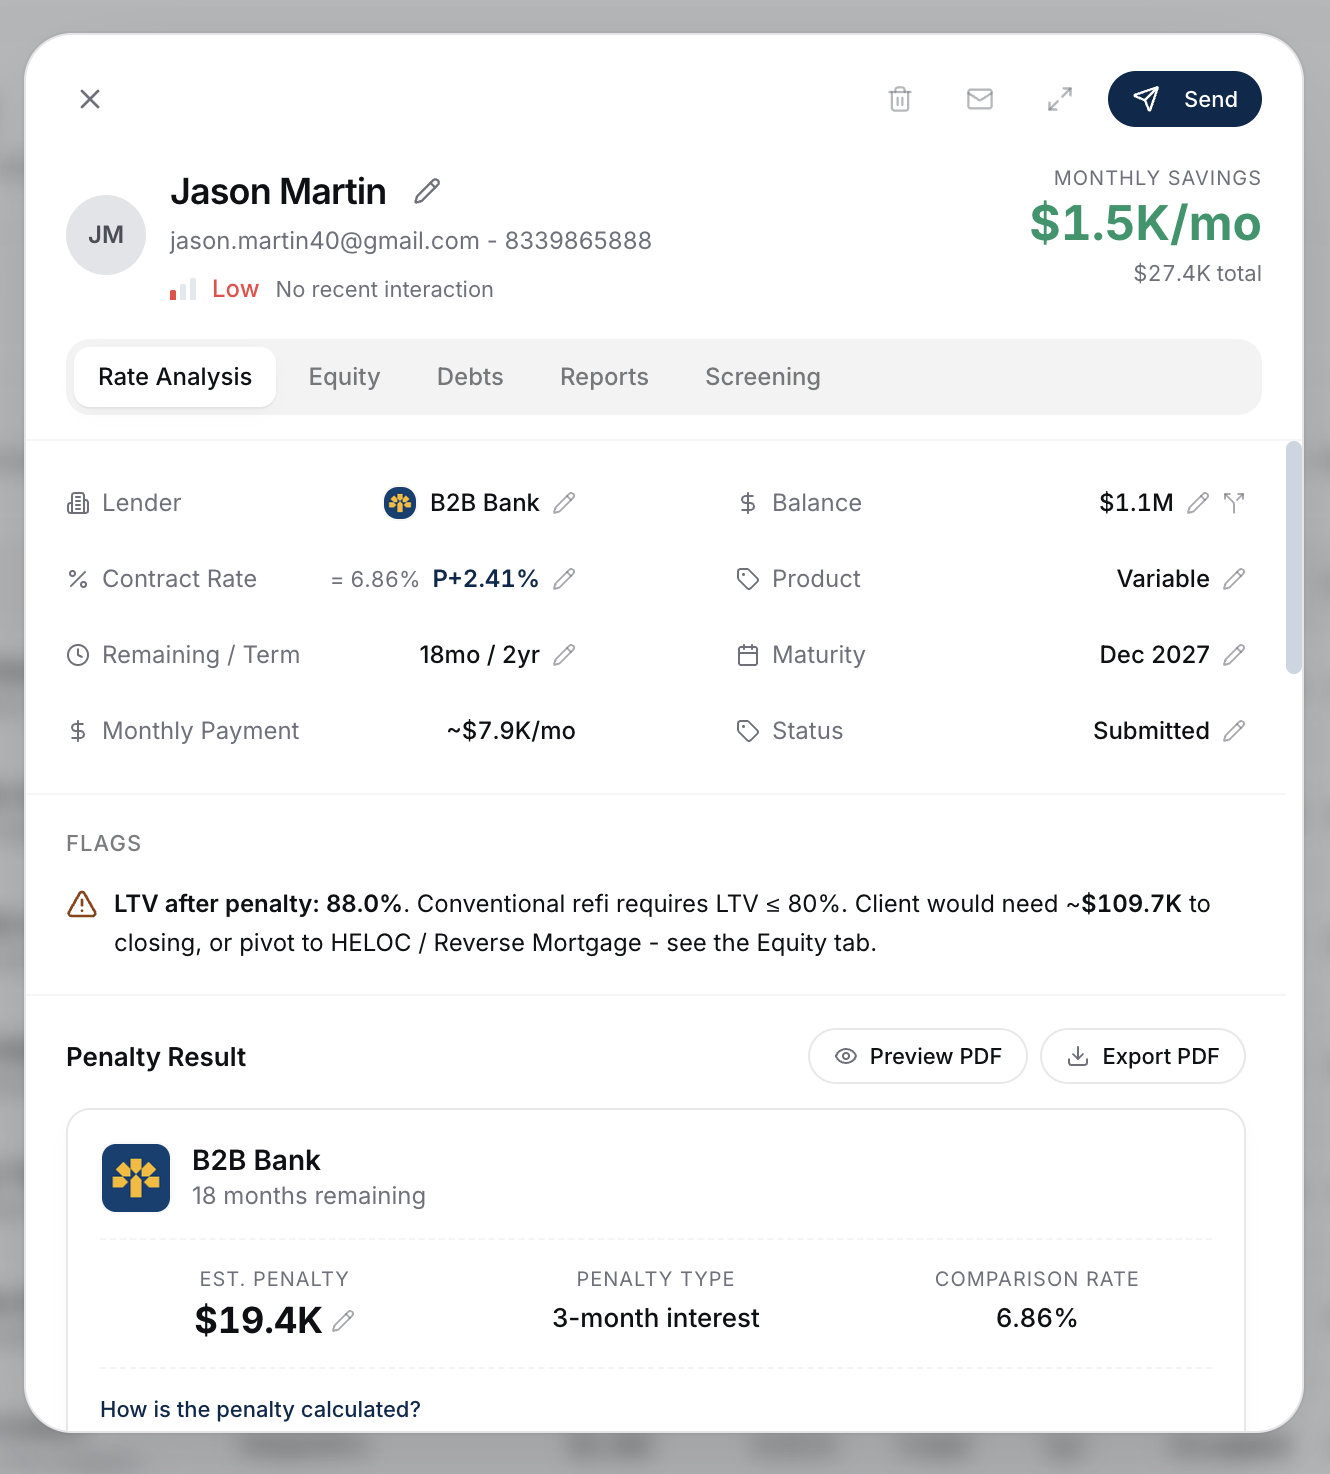
- From the Refinance page, click a candidate row to open their detail view.
- Click Send in the top-right of the modal.
- The compose drawer opens with your default template pre-filled and the client's data merged in.
The top of the compose window repeats who you're sending to, along with any warnings worth a second look before the email goes out. A High LTV chip next to the client's name means their loan-to-value after penalty sits above the 80% conventional refi cap, so a standard refinance likely won't qualify - the same flag you see as a warning triangle on the refinance list. A Contacted chip means you've emailed them before, with the date.
Picking A Template And Sender
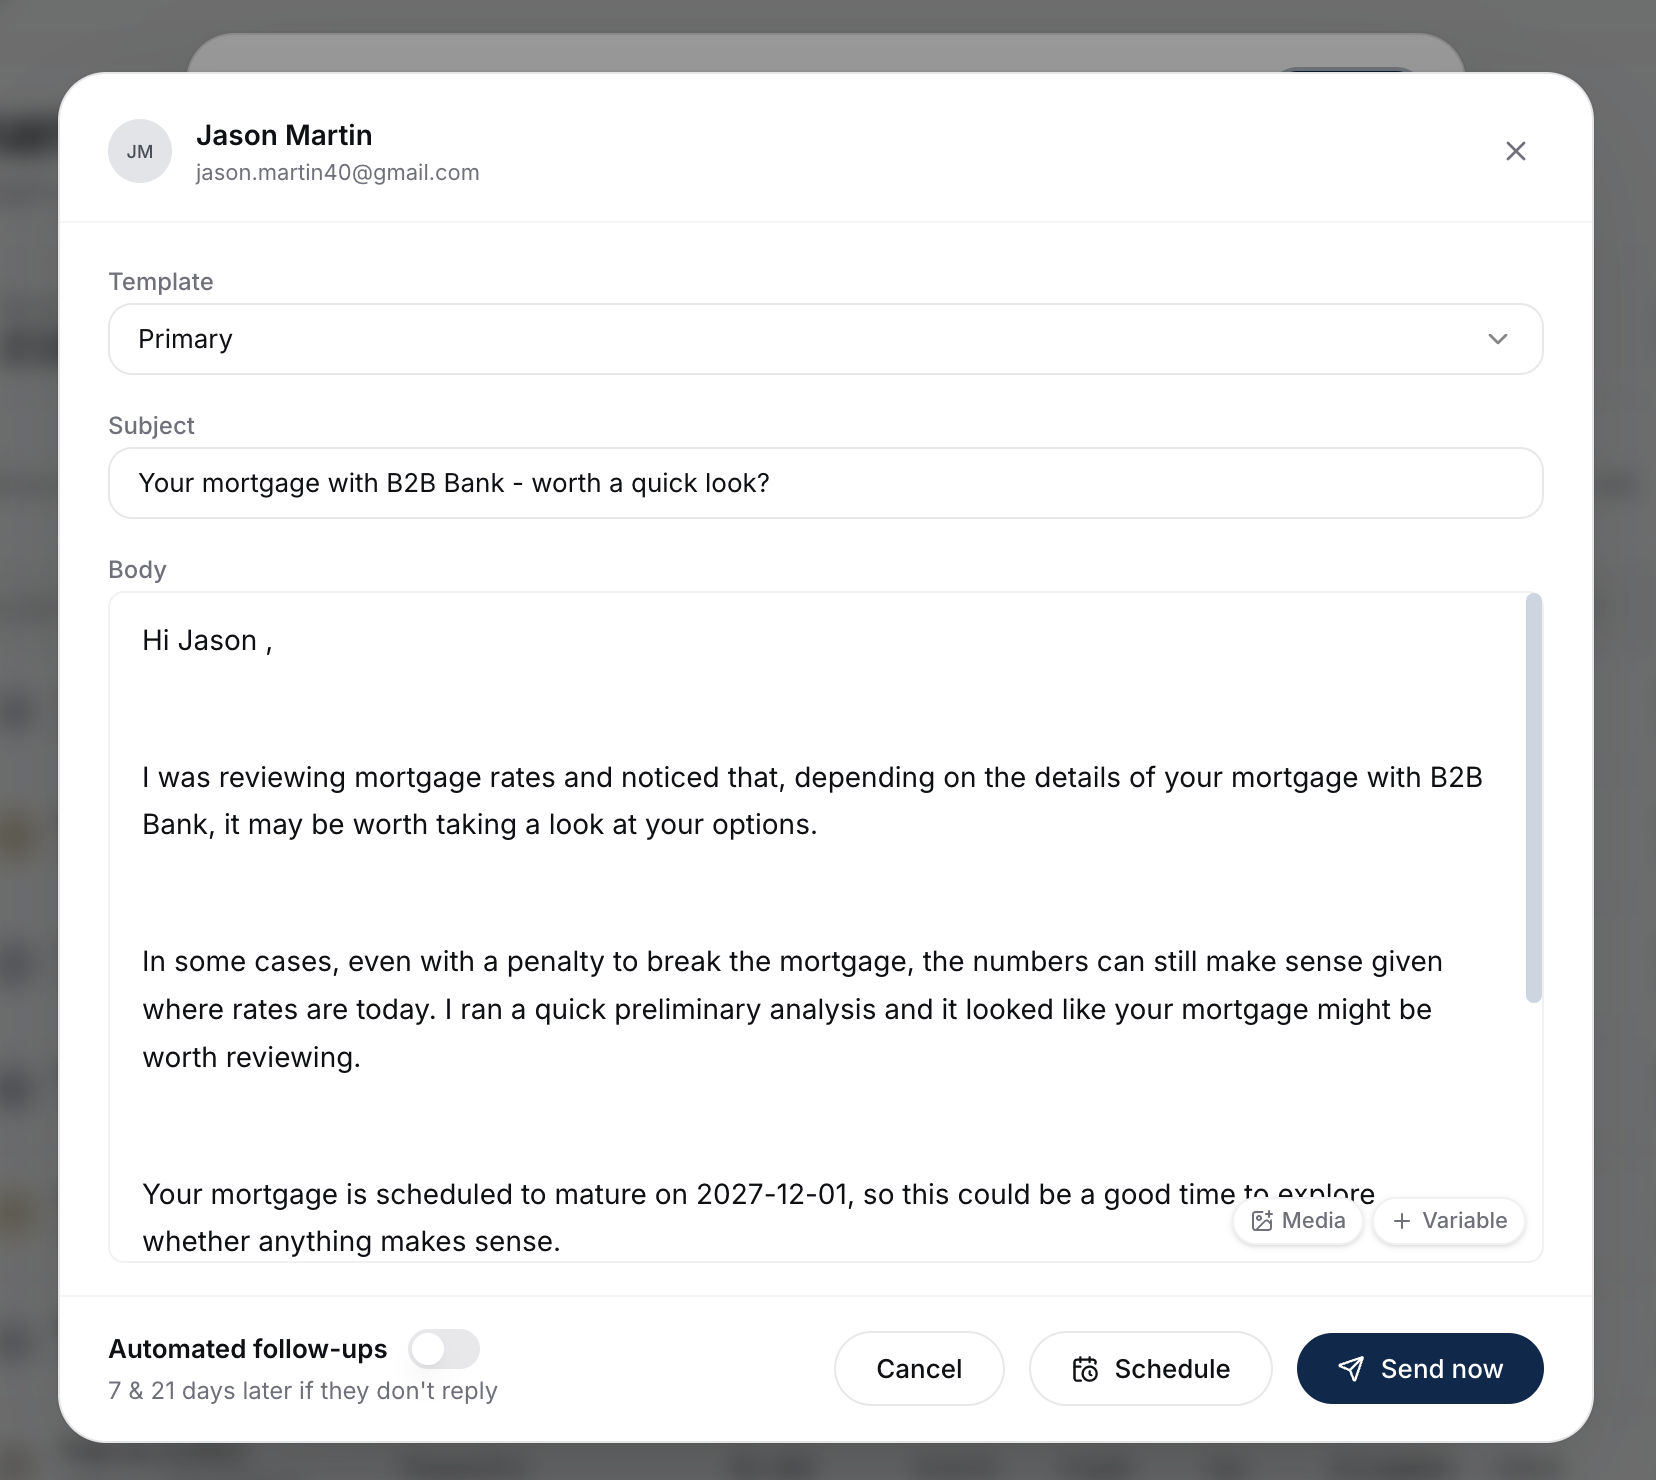
The Template dropdown lists your saved variants of the initial template (warm vs strict, etc.), grouped into My Templates (your own) and Shared Templates (ones your brokerage has shared). Your personal default is pre-selected. Pick the right one for this client, or choose Add more templates at the bottom to create a new one. See Editing The IRD Email Template.
If you're on a team where more than one person could send this email, a Sender dropdown appears next to the template picker. Use it to choose who the email goes out as - yourself, or the principal broker when you're allowed to send from the shared inbox. It defaults to whoever normally sends for you. On a solo account there's only one possible sender, so the Sender picker is hidden and you'll see just the Template field.
Whoever you pick as the sender also sends the automated follow-ups for this client, so the whole thread stays under one name. This applies on the Refinance, Renewals, and Leads lists.
Customizing Before Send
You can edit anything in the email before sending. Common tweaks:
- Add a personal opening line referencing your last conversation.
- Adjust the projected savings phrasing if you want to soften or sharpen.
- Add an attachment (a downloadable refinance report or penalty PDF - see Downloading Refinance And Penalty Reports).
Always re-check the merge fields if you've moved sentences around.
Sending
Click Send to fire it immediately. The email goes from your real address.
If the client is flagged high LTV, a confirmation appears before anything sends, showing their loan-to-value after penalty and roughly what they'd need to bring to closing. Choose Cancel to go back, or Continue to send anyway - sometimes you have a reason to reach out regardless. Tick Don't show me again if you'd rather not be asked in future; the flag still shows next to the client's name either way.
The same check runs when you schedule a message instead of sending it now, and when you message several clients at once. On a group send it tells you how many of the people you selected are high LTV rather than naming one, and the rest of your selection is unaffected if you continue.
If you'd rather send it later or set up automated follow-ups, see Scheduling Sends And Automated Follow-Ups.
Messaging Several Clients At Once
You don't have to send one at a time. Tick the checkbox on each client you want (or use the header checkbox to select the whole page, or every client matching your current filters), and a bar appears at the bottom of the list with a Message button.
Clicking Message opens the same compose window, addressed to everyone you selected. A couple of things work differently from a single send:
- The top of the window shows a few of the recipients by name plus a count of the rest, so you can confirm who it's going to.
- The merge fields stay as fields (for example the client's first name and lender) rather than being filled in with one person's details. Each client receives their own details filled in when the email goes out.
Everything else is the same: pick a template, edit the wording, then Send now to send to everyone immediately, or schedule it and turn on automated follow-ups. Clients without an email on file, and anyone already contacted at this stage, are skipped automatically.
Exporting Your Selection To A Spreadsheet
The same selection bar has an Export button. Click it and BrokerPlus downloads an Excel file (.xlsx) of everyone you selected, with the same details you see on the list: client name, email, phone, date of birth, lender, balance, rate, type, term, term left, status, maturity, and estimated savings.
It's the quickest way to review a whole list offline or share it with someone who doesn't log in. The export works the same way on the Refinance, Renewals, and Leads lists, and respects your current filters and the "view all" toggle - you get exactly the clients you selected.
What Happens Next
- The client appears on the Contacted page as No Reply (or Scheduled if you used send-later).
- When they reply, sentiment is detected and they move to Interested or Not Interested.
- If you toggled follow-ups on, day-7 and day-21 follow-ups fire automatically unless they reply first.
What To Do Next
- Schedule sends and turn on automated follow-ups: Scheduling Sends And Automated Follow-Ups.
- To reach out on a recurring schedule without selecting clients each time, set up auto outreach: Enabling And Adjusting Auto Outreach.